—News from the studio—
It's very common for an artist to build something to solve a problem or meet a need in the studio. Many times, I stop everything and construct a solution. It may take an hour or it may take longer. I've found that it is always worth the work to customize my shop. Here's the story of one solution.
Coming back from the art supply store a few years ago, I met my brother-in-law on the road, going the opposite direction. I discovered he was heading to the woodworking store, so we went together. I had just looked at an easel and had decided I could build the same thing myself.
We came home with a couple sticks of quarter-sawn oak and went to work. In a day, we'd made an easel that is stronger and taller than the model I was looking at. In the end, I spent about the same amount of money as it would have cost to buy the easel. But I made it my own, and it works great.
 |
| The easel, newly built |
Here's the process we followed to create the easel.
The wood
To begin with, quarter-sawn wood is cut straight from the tree without additional milling. The easel model in the art store would have used wood that was thinner. Also, my wood was cut with the grain running across the thickness to aid against warping. I don't know how the wood in the store model was milled.
The main rail
This easel has two legs. The back support is a simple plank of wood. The post in the front is cut with angled sides for the top and bottom sliders to run on.
 |
| The front post with angled sides |
The base
The front rail has another piece of wood attached at a tee on the bottom with four stove-bolts. We screwed rubber feet on the bottom of the base, and another rubber foot on the bottom of the rear leg.
 |
| Base from the rear with lock nuts on the stove bolts |
 |
| The base has two rubber feet |
The hinge and chain
The two legs of the easel are connected with a simple gate hinge and a chain to keep it from unfolding. The front post extends up past the hinge.
 |
| Hinge at top |
 |
| Chain |
The top slider
The top slider is built of four pieces of wood. It's what holds the top of the canvas or panel in place. It rides on the front post with two beveled clips on the back that form a groove for the front post to ride in. The positioning knob tightens to create tension and hold the slider in place anywhere on the post.
 |
| The top slider with rear clips and positioning knob. |
Here, we can see the channel in the back of the slider that matches the shape of the front post.
 |
| Top slider from above |
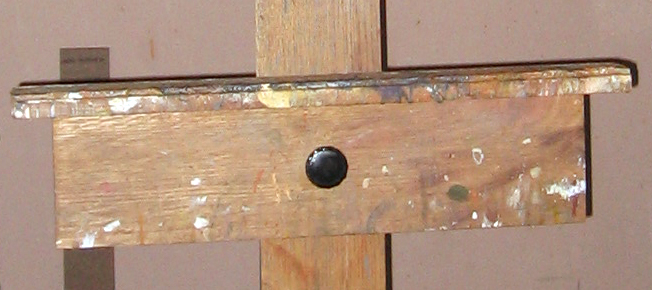
The position knob
The position knob is the crucial part of the easel design I saw at the art store. Above, you can see we've used a knob we found at the home-remodeling store. We drilled from the back with bits that matched the diameters of the pronged tee nut that sits between the knob and the bushing.
 |
| Pronged tee nut |
Initially we glued the tee nut as well as hammering it. But I discovered that the threads only lasted about three years, so the new ones are just tamped into place.
The slider bushing
We found a furniture glider to use as a bushing between the slider and the post. The small ones are the perfect fit. It is recessed into the back so that all the surfaces are flush.
 |
| The top slider from the back with clips and bushing |
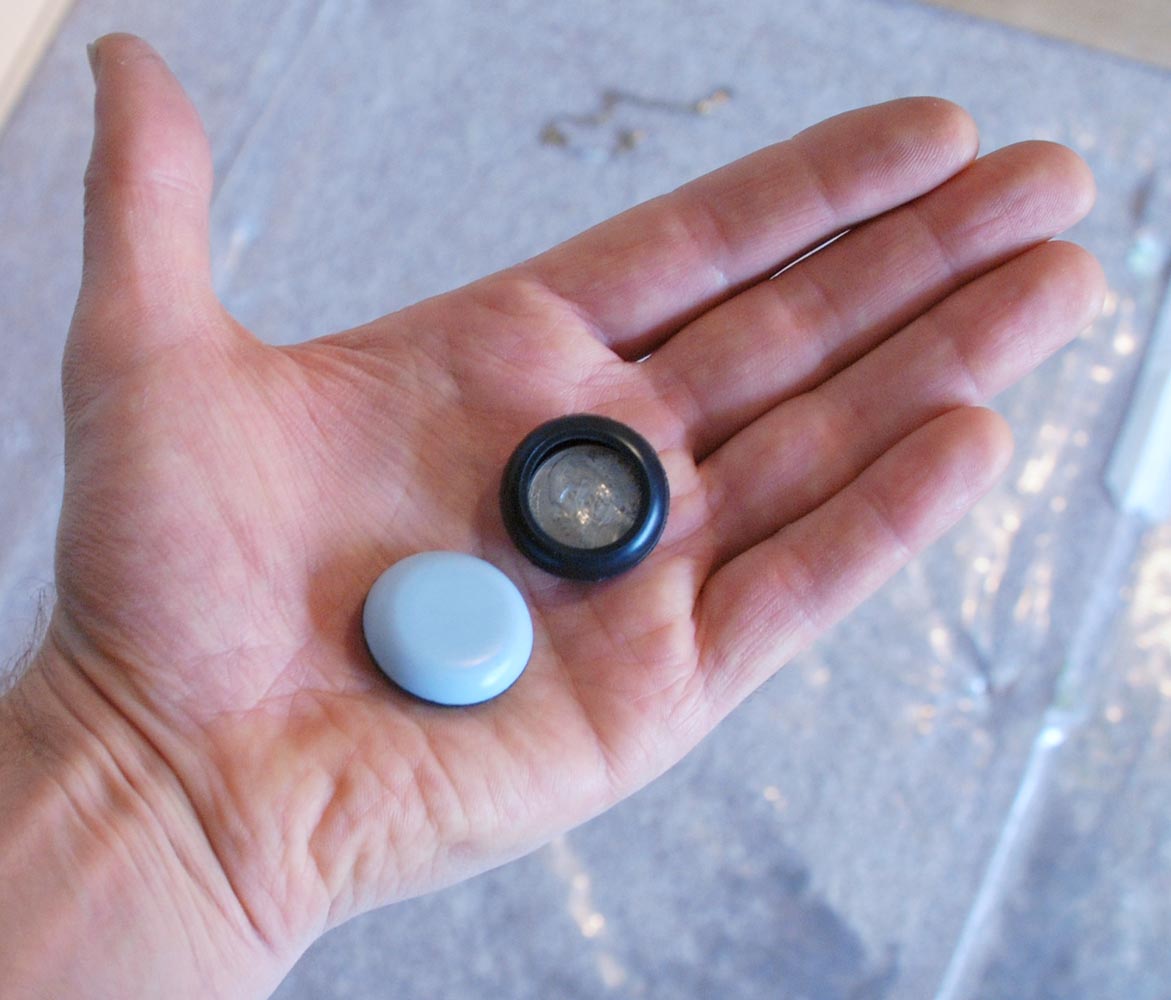
Bill came up with a great solution for tightening the knob against the bushing. He inserted a nickel coin into the glider for the post on the knob to hit.
 |
| Furniture gliders. One has a nickel inserted. |
We inserted a metal washer in the front to protect the thread opening and give it a finished look.
The bottom slider
The bottom slider works in an identical fashion, except it is bigger and the canvas support is on the top of the slider instead of the bottom. Both the sliders have notches and grooves to accommodate hardboard panels or canvas boards.
 |
| The bottom slider |
 |
| The bottom and top sliders use the same clip design |
And that's all there is to it. The whole project came together quickly with just a table saw and drill.
And here's the easel after three years of painting.
Click any image to open a gallery of larger images, and hit escape to return to the blog.